In this step-by-step guide, you will learn everything you need to know about restoring and repairing old Japanese garden tools. Whether you have inherited a set of rusty tools or you are a passionate gardener looking to breathe new life into your beloved tools, this article will provide you with the knowledge and techniques needed to make them shine again. From cleaning and sharpening to oiling and restoring the handle, we will take you through each step so that you can fully enjoy the beauty and functionality of these traditional tools.
First, we will start by discussing the importance of cleaning and removing rust from your old Japanese garden tools. You will learn how to carefully scrub away dirt and rust without damaging the tool itself. Next, we will teach you the art of sharpening the blades, ensuring that they are in optimal condition for efficient gardening. Additionally, we will guide you through the process of oiling the tools to prevent future rust and enhance their durability. Lastly, we will cover the restoration of the handle, providing you with techniques to repair or replace it if necessary. By the end of this guide, you will be equipped with the knowledge to restore and repair your old Japanese garden tools, allowing you to enjoy their beauty and functionality for years to come.

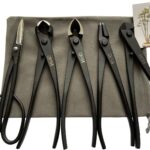
Choosing the Right Tools
Restoring and repairing old Japanese garden tools can be a rewarding and fulfilling experience. These tools have a rich history and are known for their durability and craftsmanship. By following a step-by-step guide, you can bring these tools back to life and ensure their longevity.
Assessing the Condition of the Tools
Before you begin the restoration process, it is important to assess the condition of the tools. Look for any signs of rust, corrosion, or damage. Take note of any missing or broken handles, cracks, dents, loose components, or misalignment. This assessment will help you determine the extent of the restoration needed and the tools required for the job.
Identifying the Tools Needed for Restoration
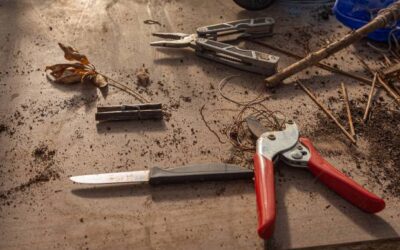
Once you have assessed the condition of the tools, you can identify the specific tools needed for restoration. Some common tools you may need include wire brushes, sandpaper, rust remover, pliers, a hammer, epoxy or wood glue, a vice or clamp, and a sharpening stone or file. It is important to have the right tools on hand to ensure a successful restoration process.
Preparing the Tools for Restoration
Before you can begin restoring the tools, you need to prepare them properly. This involves cleaning the tools, removing rust and corrosion, and sharpening the blades.
Cleaning the Tools
Start by cleaning the tools to remove any dirt or debris. Use warm soapy water and a wire brush or cloth to gently scrub the surfaces. Rinse the tools thoroughly and dry them completely before moving on to the next step.
Removing Rust and Corrosion
To remove rust and corrosion, you can use a rust remover or a mixture of vinegar and baking soda. Apply the rust remover or vinegar solution to the affected areas and let it sit for a few minutes. Then, scrub the rusted surfaces with a wire brush or steel wool until the rust is removed. Rinse the tools again and dry them thoroughly.
Sharpening the Blades
If the blades of the tools are dull, you will need to sharpen them. Use a sharpening stone or file to carefully sharpen the blades. Hold the tool securely and move the stone or file along the blade at a consistent angle. Take your time and apply even pressure to ensure a sharp edge. Once the blades are sharpened, wipe away any metal shavings and test the sharpness by cutting a piece of paper.
Disassembling the Tools
To effectively restore the tools, you may need to disassemble them. This will allow you to access all the components and repair or replace any damaged parts.
Taking Apart the Components
Carefully disassemble the tools by removing any screws, bolts, or fasteners. Use a screwdriver, pliers, or the appropriate tools for the job. Keep track of the order in which the components are removed to make reassembly easier later on.
Labeling and Organizing the Parts
As you disassemble the tools, it is important to label and organize the parts. Use small bags or containers to keep the screws, bolts, and other small components together. Labeling them will ensure that you know where each part belongs during the reassembly process.
Repairing Damaged Parts
Before you can restore the tools, you will need to repair any damaged parts. This may involve replacing broken or missing handles, repairing cracks and dents, or fixing loose or misaligned components.
Replacing Broken or Missing Handles
If a tool has a broken or missing handle, you can easily replace it. Measure the length and diameter of the handle and purchase a new one that matches these specifications. Remove the old handle by unscrewing any fasteners or using a saw to cut through it. Fit the new handle into place and secure it with screws or bolts.
Repairing Cracks and Dents
To repair cracks and dents in the tools, you can use epoxy or wood glue. Apply the adhesive to the damaged area and press the cracked or dented parts together firmly. Wipe away any excess adhesive and let it dry according to the manufacturer’s instructions. Once the adhesive is dry, sand the repaired area to smooth it out.
Fixing Loose or Misaligned Components
If any components of the tools are loose or misaligned, you will need to fix them. Use pliers or a hammer to tighten any screws or bolts that may have come loose. If a component is misaligned, gently tap it back into place with a hammer or mallet. Ensure that all the components are secure and properly aligned before moving on to the next step.

Restoring the Tools
Once the damaged parts have been repaired, you can begin the restoration process. This involves sanding and smoothing the surfaces, applying protective coatings, and polishing the metal.
Sanding and Smoothing the Surfaces
To restore the tools to their original condition, sand and smooth the surfaces. Start with a coarse-grit sandpaper to remove any roughness or imperfections. Then, gradually move to finer-grit sandpaper to achieve a smooth finish. Wipe away any dust or debris and ensure that the surfaces are clean before proceeding.
Applying Protective Coatings
To protect the restored tools from rust and corrosion, apply a protective coating. You can use a clear lacquer or a rust-resistant paint. Apply the coating evenly and let it dry according to the manufacturer’s instructions. This will help preserve the tools and ensure their longevity.
Polishing the Metal
If the tools have metal surfaces, you can polish them to restore their shine. Use a metal polishing compound or a mixture of vinegar and salt to remove any tarnish or oxidation. Apply the polishing compound or vinegar solution to a cloth and rub it onto the metal surfaces in a circular motion. Continue polishing until the desired shine is achieved.
Reassembling the Tools
Once the restoration process is complete, you can begin reassembling the tools. Use the labeled parts to guide you and follow the reverse order of disassembly. Ensure that all the components are properly aligned and fit together snugly. Tighten any screws or bolts securely but be careful not to overtighten and damage the newly restored parts.
Ensuring Proper Alignment and Fit
As you reassemble the tools, pay close attention to the alignment and fit of the components. Ensure that all the parts fit together properly and that there are no loose or misaligned components. This will guarantee the functionality and longevity of the restored tools.
Testing and Adjusting
Once the tools are reassembled, it is important to test their functionality. Use each tool as it is intended and check for any issues or malfunctions. If necessary, make any adjustments to ensure proper functionality and performance.
Checking the Functionality of the Tools
Test each tool by using it in a practical setting. For example, if you have restored a pruning shear, use it to trim a branch. Pay attention to how well the tool performs and whether it feels comfortable and efficient to use. If any issues are detected, you can make the necessary adjustments before moving on to the final step.
Making Necessary Adjustments
If you encounter any issues during the functionality testing, make the necessary adjustments. This may involve tightening screws or bolts, realigning components, or sanding and smoothing certain areas. Take the time to make these adjustments to ensure that the tools are in optimal working condition.
Maintaining the Restored Tools
To ensure the longevity of the restored tools, it is important to maintain them properly. This involves proper storage and regular cleaning and sharpening.
Proper Storage and Maintenance
Store the restored tools in a dry and protected area to prevent rust and damage. Hang them on hooks or place them in a designated toolbox or storage compartment. Avoid storing the tools in damp or humid environments, as this can promote rust and corrosion.
Regular Cleaning and Sharpening
To keep the restored tools in optimal condition, clean them regularly after each use. Use warm soapy water and a cloth or brush to remove any dirt or debris. Dry the tools thoroughly before storing them. Additionally, regularly sharpen the blades using a sharpening stone or file to maintain their cutting efficiency.
Preserving the Tools for the Future
To preserve the restoration process and ensure the longevity of the tools for future generations, consider documenting the restoration process and creating a maintenance schedule.
Documenting the Restoration Process
Documenting the restoration process can serve as a guide for future restorations and allow others to appreciate the craftsmanship involved. Take detailed notes, photographs, and even create a video to showcase the step-by-step process.
Creating a Maintenance Schedule
Creating a maintenance schedule will help you keep track of the necessary tasks and ensure that the restored tools receive the care they need. Schedule regular cleaning and sharpening sessions, as well as inspections for signs of rust or damage. By following a maintenance schedule, you can prolong the lifespan of the restored tools and continue to enjoy their functionality and beauty.
Conclusion
Restoring and repairing old Japanese garden tools is a labor of love that can bring these pieces of history back to life. By following a step-by-step guide, you can assess the condition of the tools, prepare them for restoration, repair any damaged parts, and restore them to their former glory. Maintaining the tools through proper storage, cleaning, and sharpening will ensure their longevity for years to come. By appreciating the beauty and functionality of these restored tools, you can continue to enjoy their use and pass them down to future generations with pride.